Listen folks, I know that the social media landscape seems to change every week. Just a month ago, I would have told you that Threads was my network of choice, but now? I’m all in on Bluesky.
It feels like a return to old Twitter, before it devolved into a cesspool of ads and infighting that hates its users.
While the standard username/handle is @yourname.bsky.social (which is honestly totally fine), there’s a nice feature that you can use that allows you to use your own domain as your handle. For example, I’m on there as @graycastlepress.com.
Luckily the process is… mostly easy, with only one kind of technical step. If you have access to your domain registrar and are comfortable making a simple (easy to reverse) change, you can set it up in ten minutes tops. Well, kinda, but more on that later.
1. Set up your Bluesky account
This should go without saying, but you’ll need to set up your Bluesky account before you can jump into the remaining steps. Signing up is easy, and you can do so at https://bsky.app
NOTE: You might be able to do this domain name handle magic at signup time, but that’s not how I ended up approaching it. For now, you can sign up with whatever handle makes sense, with the intent of changing it shortly.
2. Change Account Handle Settings
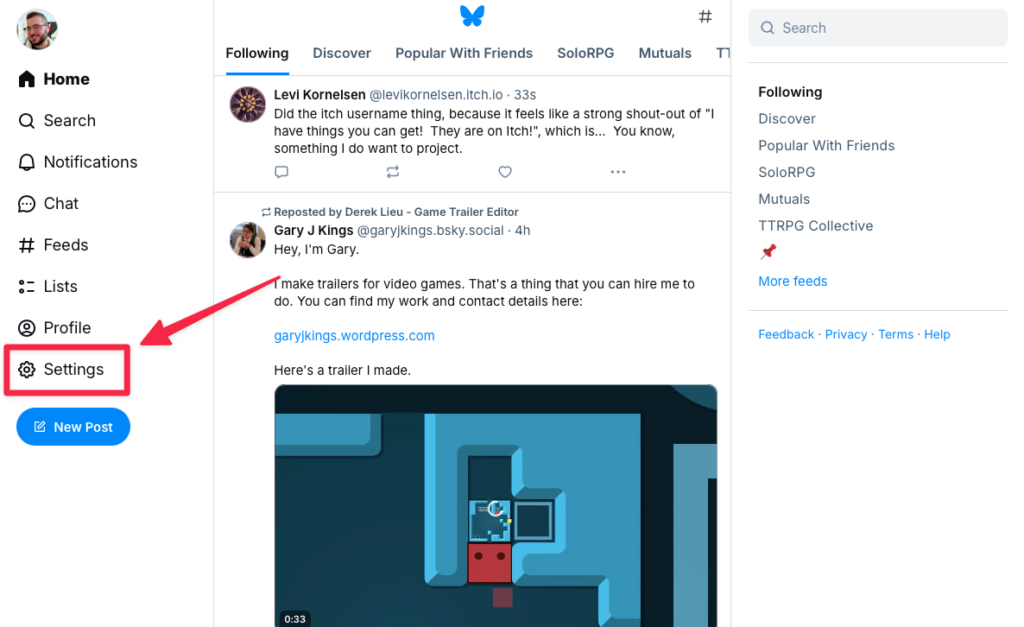
Next, you’ll want to be logged into your Bluesky account and find the Settings panel.
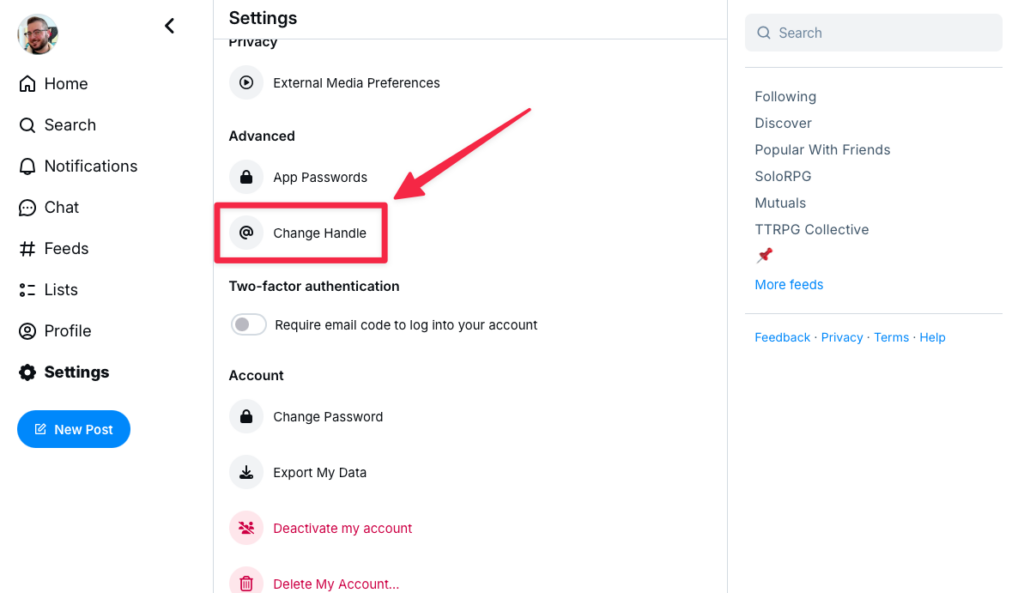
Once in your settings, look for the option to Change Handle.
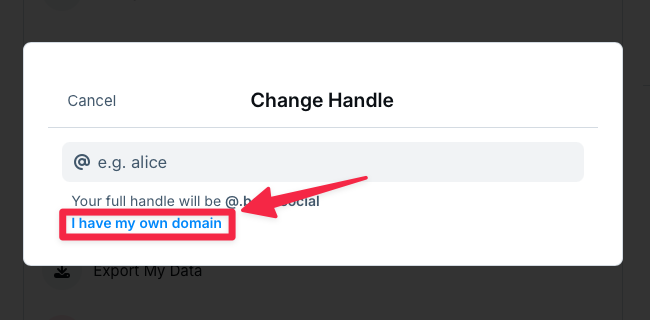
This will bring up a popup that lets you either change your current handle with the @yourname.bsky.social format, or for our purposes you can click the “I have my own domain” link to bring up the options for using a domain as your handle.
3. Verify Domain Ownership
Bluesky offers two ways to accomplish this, but it’s important! Otherwise anyone could use any domain they wanted. Chaos!
Option 1: Update Domain DNS Settings
This is probably the most “technical” of the sections, and requires some access to the system where you registered your domain. For me, that was in my DreamHost panel. Wherever that might be, dig into your domain settings and find where you can make updates to those DNS settings.
From there it should be relatively simple (and something that should both not impact your domain much at all, as well as be easily reversed). You’ll want to add a new record using the details shown on the “Change Handle” popup.
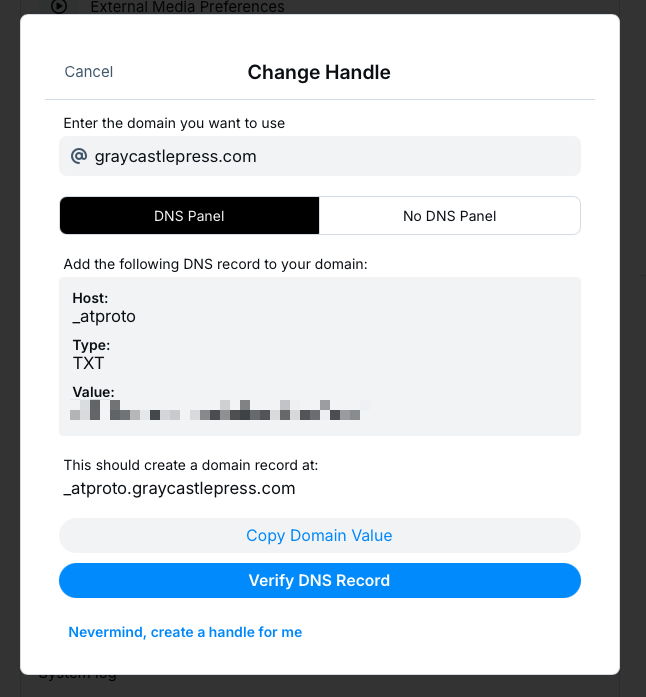
As an example, this is what the DNS record looks like on my own settings:

NOTE: It can take some time depending on your settings and registrar for the changes to your DNS settings to propagate, aka be “seen” by other systems on the internet. You’ll want to verify your setup as shown below until you get confirmation that the change has been detected.
Option 2: Upload a File to Site File Structure
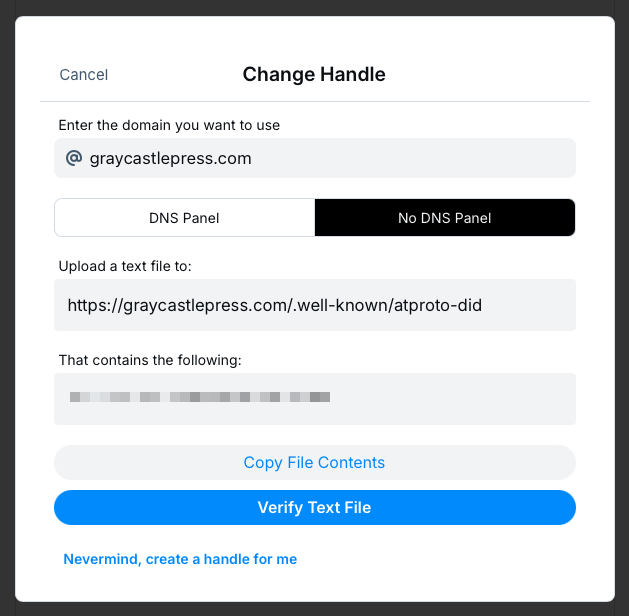
While this isn’t the route I took, you can simply create a .txt file with the contents offered by the “No DNS Panel” option and upload it to the file structure of your website. This might be a more approachable option for folks, and should be relatively straightforward if you have FTP or SSH access to your server.
3. Verify Domain Handle Settings
Once your DNS changes have propagated (which as I said above can take some time), it should be as simple as clicking the verify option on the Change Handle popup.
It’s worth adding that you can come back to this at any time, since DNS propagation can take a little bit of time. You just have to repeat step 2 above to get back to the Change Handle popup, re-enter your domain, and verify.
For your new handle, you can either go with your base domain or use an additional prefix. Here’s what that means and why you might choose one over the other:
- Base domain, like @graycastlepress.com
- Prefix with a name or username, like @luke.graycastlepress.com
I’d choose to use a prefix/username prefix with the domain if there might be multiple people posting eventually from your domain, or if you really want to make it clear that you are posting and not “the business” so to speak.
I chose to go with just the domain, since I don’t foresee anyone else posting for Graycastle Press, and I like the simplicity.
Make sure your handle is updated and click Verify. If everything is set up correctly, huzzah! You have a shiny new handle for Bluesky that reflects your validated ownership of your domain.
4. Use Your New Domain Handle!
That’s it! Once you go through this process once, you’ll only need to repeat it again if you want to change your handle for some reason.
